
Choosing the Site
Choosing a suitable site for your Riding Arena is often dictated by the amount of land available to you. If you are short of land you won’t have much choice as to where the arena is built. If you are lucky enough to have a choice there are a variety of factors that should be considered. Some obvious, some not!
1. Access – The majority of people fail to consider the implications of poor access on arena construction. Poor access means suppliers cannot use large delivery vehicles thus dramatically increasing haulage costs as more trips with smaller vehicles have to be made. Poor access also means the contractor hired to build the arena has to use smaller machinery meaning the job takes longer and costs more. Positioning a Riding Arena to allow for good access can reduce costs by up to 30% so it requires serious consideration!
If the conclusion of a site survey shows access is poor all is not lost! There is a nifty trick to allow you to gain the benefits of using large delivery vehicles without actually having them on site. How? Contact nearby farmers and ask if they would allow you to drop your materials at their yard and then transship them in smaller vehicles to the arena. Farms usually have excellent access making deliveries a doddle. Getting your materials from the farm to your arena is a task most farmers will be able to help with as they have the facility to load and transport most materials. The farmer will obviously charge for this service but it will be a lot less than having the materials hauled in direct on smaller vehicles.
2. Drainage – Probably the most important aspect of arena construction is the drainage. Without good drainage you cannot have an ‘all weather’ surface. When positioning the arena you need to consider where water collected in the drainage system will be discharged to e.g. ditch, soak-away, pond etc. It is recommended that you seek advice from your local authority at this stage to ensure discharge into nearby watercourses is permitted.
3. Levels – Excavation of a site needs serious consideration and should be kept to a minimum. An uneven site will require a lot more excavation than a level site, so take this into account. More excavation means more spoil to dispose of, a process that can be very costly. Sloping land may require leveling by a process known as cut and fill. This basically means sub-soil is excavated from the higher side of the site and deposited on the low side to create a level surface.
4. Exposure – With some Silica Sand based surfaces wind erosion becomes an issue. Silica Sand is very much like egg timer sand when dry and thus is prone blowing away. It is therefore advisable that arenas are not placed in exposed areas to avoid potential loss of your surface to the elements. In some cases this is unavoidable and may require further measures to be taken such as hedge and tree planting to create a windbreak.
Construction Stage 1 – Marking Out and Excavation
So you’ve chosen the site, and assuming it’s fairly level now is the time to get the site set out ready for initial excavations. No matter how big your arena is going to be it is good practice to mark out a slightly bigger area than the finished arena. A minimum of 1 meter working room should be allowed for around the outside if the excavation. Therefore if your arena is going to be 40 x 20m you will need to excavate an area that is 42 x 22m to allow sufficient working room. Typically the 4 corners of the excavation will be marked out with strong wooden pegs. A string line is then run from peg to peg allowing special marking spray paint to be used to mark out the perimeter of the dig. Once the 4 pegs are in place it is important to check that all is square. To do this you will need to measure the diagonals. If the diagonals are the same measurement you have marked out square.
The first stage of the excavation is to remove the topsoil to reveal firm subsoil. You must never build on topsoil as the organic matter contained within means topsoil is prone to waterlogging and has very poor load bearing ability. The depth of the topsoil will vary from with some sites having just an inch of topsoil and others having up to a foot! The topsoil should be removed and neatly stockpiled or disposed of through an approved contractor. It will always be cheaper to try and use the topsoil in the final landscaping of the site rather than to remove it, although sometimes you may be lucky enough to sell it! Make sure your excavator driver seals the heap of topsoil by compacting and smearing the top and sides of the stockpile to keep it dry. This will keep the topsoil dry and friable making the final landscaping job much easier.
Construction Stage 2 – Drainage
Easily the most important factor of any arena build is good drainage. If drainage is poor it doesn’t matter how much you spend on the surface it will not work! A typical drainage pattern is known as a ‘Herringbone Pattern’. This basically means a 4-6inch (100-150mm) central collector pipe (or spine) runs down the center of the arena. Spurs consisting of 75-100mm perforated pipe are then run at 45-degree angles into the spine. The spurs should be spaced at 5m apart. The central spine is discharged into a soak-away, ditch, pond etc. The depth of the drainage channels will be determined by the depth of the discharge point. The drainage trenches should be kept fairly shallow whilst still allowing a suitable fall in order to keep the cost of the backfill down.
Construction Stage 3 – Lower Membrane (Woven)
The drainage channels should now have been dug ready for the lower membrane to be installed. A Woven Geotextile Membrane (G90), which is very similar to the material used in large dumpy bags supplied by builder’s merchants, should be used to cover the entire excavation. In an ideal world the membrane should also line the drainage channels to prevent the drainage system from blocking with silt and clay from the surrounding sub-soil. Any joins/seams in the membrane should be sealed with a tough cloth tape. The membrane should now be laid leaving the lined drainage trenches ready to receive the perforated pipework.
With the pipework now connected the drainage channels should be backfilled to original excavation level with a clean washed 20mm Gravel. It is essential that the gravel used is clean to prevent blocking the perforations in the drainage pipe.
Construction Stage 4 – Sub-Base and Fencing
With the drainage trenches backfilled the site should now be level again. It is now time to install the sub-base that should be a minimum of 4 inches (100mm) in depth but ideally 6 inches (150mm). The choice of sub-base material will largely depend on the area you live in as the availability of materials will vary according to the local geology. In an ideal world a crushed rock should be used as it will be free from any impurities sometimes found in recycled materials, although in some areas there are very good recycled materials available. The sub-base forms the ‘foundations’ of an arena and is also very important to the drainage system. The sub-base layer will provide temporary water storage in the event of a heavy downpour thus keeping the upper surface free from waterlogging and also relieving pressure on the drainage system. Due to the water storage requirement it is essential that a clean angular material is used in a 75-40mm size. The most common materials used are Limestone, Recycled Rail Ballast, Granite and Crushed Concrete. The 75-40mm size range ensures the material compacts whilst remaining free draining. All materials should be free from dust/fines to prevent blockage of the drainage system. The sub-base material chosen will need to be leveled using an excavator and laser level and compacted in layers using a vibrating roller. A good excavator operator should be able to compact and level the sub-base to within +/- 5mm accuracy.
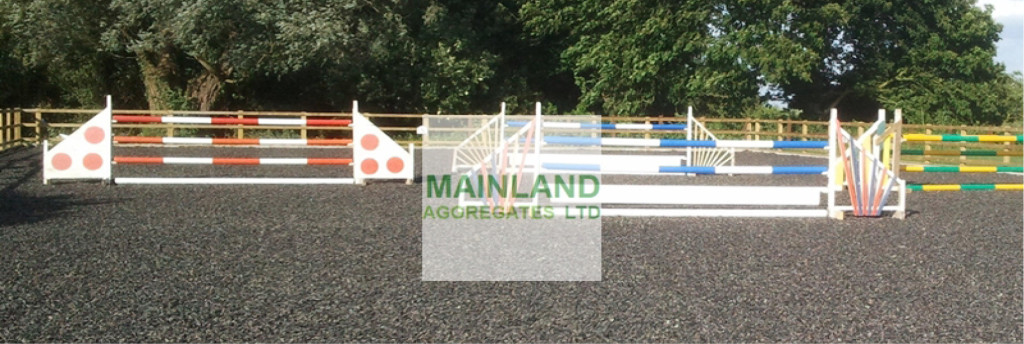
With the sub-base leveled and compacted the fencing can now be installed. Generally a 3 bar post and rail system should be used with the rails attached to the insides of the posts. This prevents potential injury to the horse and rider when riding close to the fence line. Gravel boards should be attached to the bottom of the posts as these will contain the upper surface when added. It is preferred that posts are installed using a ‘Post Knocker’ which is a tool which will mechanically hammer the posts through the sub-base and into the subsoil below.
Construction Stage 5 – Upper Membrane (Non-Woven)
The installation of an upper membrane is critical to the performance of a riding arena. We recommend a Non-Woven Geotextile (NW8) which is best described as being similar to the fleece gardeners use to protect plants from frost only much thicker. Extreme care must be taken when installing this membrane as any gaps in the joins or holes will allow the upper surface to works its way through and eventually lift the membrane. The number one cause of any membrane rising to the surface is poor installation. At this stage the upper membrane should be treated like a pond liner with the eventual aim of creating a watertight container. This means securing the membrane to the gravel boards to ‘contain’ the surface and also ensuring all joins and overlaps are secured with our Cloth Tape. Silica Sand surfaces are notorious for being very fine and free flowing and thus any holes in the membrane will allow the sand to migrate downwards and thus lift the membrane. The upper membrane performs 4 main tasks:
1. Prevent stone from the sub-base from rising to surface.
2. Prevent the final surface from migrating downwards and blocking the sub-base.
3. To grip the final surface ensuring when pressure is applied by the horses hooves no shear movement occurs.
4. To rip if the horse’s hooves come into contact with the membrane thus preventing tripping and possible injury. (9 times out of 10 this happens if the surface is not maintained properly)
Construction Stage 6 – Surface Installation
With the upper membrane installed you can now add the final surface. The choice of surface is usually affected by budget and personal experience. A lot of people base their choice of surface on what they have ridden before and recommendation from friends. For the purposes of this guide we will assume you have chosen the most popular and versatile Silica Sand and Arena Flex Rubber Chip surface. The Silica Sand will be the first material to arrive with enough ordered to give a depth of 4 inches (100mm). It is crucial that no vehicles/machinery are allowed to drive on the upper membrane as any damage to the membrane will cause problems down the line. With this in mind it is good practice to tip the first load of Silica Sand in the gateway then use an excavator to level out the heap to create a temporary road into the arena. This will mean the truck with the next delivery of sand will be able to reverse over the sand rather than the membrane.
The Silica Sand should be installed in 2 x 50mm layers ensuring each layer is leveled using a laser level for accuracy and compacted using a vibrating roller. It may be necessary to roll the sand with the vibrate function off in the first instance to prevent the roller from burying itself. If the sand is particularly wet it is not recommended that vibration be used. Conversely if the sand is too dry it will need to be dampened to achieve adequate compaction.
Once the Silica Sand is compacted the Arena Footing Additives can be laid to complete the surface.
For more information please visit the author:
Mainland Aggregates Ltd.
www.mainlandaggregates.co.uk
I like how the article gives a step by step process of how a riding arena is made. And that draining the area is the most important thing to do so the surface is perfect. I think I will have a great appreciation next time I’m in an arena.
Your blog is very informative. It will enhance my knowledge and will help me for my future growth.
We are considering purchasing an equestrian facility that has 3 existing arenas. Is it possible to re-do them to insure the best and safest available arenas to use for schooling as wells as shows?
First, congratulations. Second, regarding the existing arenas, yes it is possible. Please contact us by phone or email to discuss further.
I’m very concerned about your recommendation for a layer of geo-textile fabric immediately under the top, final footing layer. In my experience (I broker horse farms and am a licensed official, as well) the (upper) layer of fabric invariably works it’s way up thru the footing, causing a complete rebuild of the arena. I am speaking of high traffic arenas, such as show grounds and public training/lesson facilities. You have not found this to be problematic?
Often, when you see geo-textile fabric emerge through an arena surface, it’s because of a poor initial installation or poor ongoing management of the arena footing. A high traffic area like the one you’ve described would require significant and active maintenance, but geo-textile fabric can be successfully used long-term even in high-traffic arenas.
Hello,
I recently bought a state of the art equestrian center based in Bay Harbor Michigan. We have about 16,000 sq ft. Of footing that we are looking to get rid of.
Congratulations on your new facility! Ultimately, your options for removal will depend on the type of material in your footing. If the footing consists of sand or dirt, sometimes you can reuse it on site on trails, keep it piled up in your property for later use, or find another facility that could use it. However, some footing additives, such as fiber or rubber, can be toxic and may fall under specific regulations for disposal. If your footing includes a type of coating with additives, we recommend contacting your local Department of Environmental Conservation (DEC), who should be able to point you toward regulations on disposal of such material in your area. In Michigan specifically, it might be worth checking the EGLE website and contacting them for advice on how to best dispose of your footing: https://www.michigan.gov/egle/0,9429,7-135-3312—,00.html